
Wes Littlefield 11.14.24

Congrats! You simply harvested a deer! However now the exhausting work begins. It’s time to area gown it, drag it to the truck, and course of the scrumptious venison. It feels like rather a lot, nevertheless it’s not as difficult because it initially appears. So let’s get began with one of the best ways to course of a deer.
How To Course of A Deer
It’s necessary to notice that everybody has a barely totally different method of processing their deer. The one outlined beneath has labored effectively for my household and me for a number of years, however we’re always making an attempt new methods and methods to do it.
Processing a deer can take a few hours, so most individuals imagine taking it to an area meat processing plant is one of the best ways to course of a deer.
I’m not towards this, however I not often take my deer to the processor for 3 causes. The primary is the expense. Taking a deer isn’t low-cost, costing round $100-$120, plus any extras you add (like grinding it or turning the venison into jerky). The second motive is as a result of I need to management what occurs to the meat. Lastly, I believe studying to course of a deer is a really invaluable talent, beginning with area dressing it.
Useful Instruments
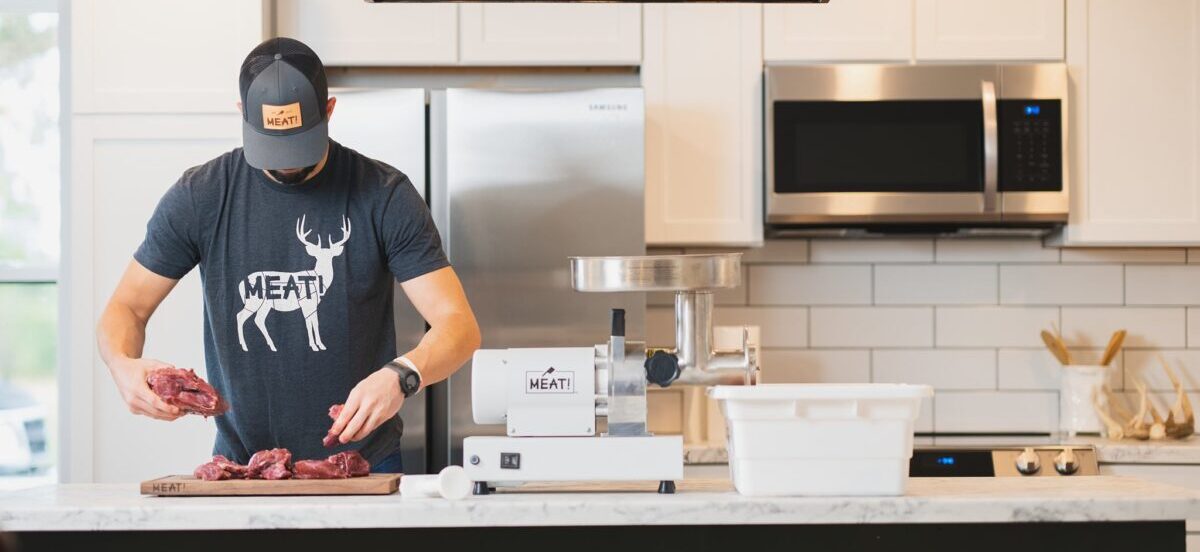
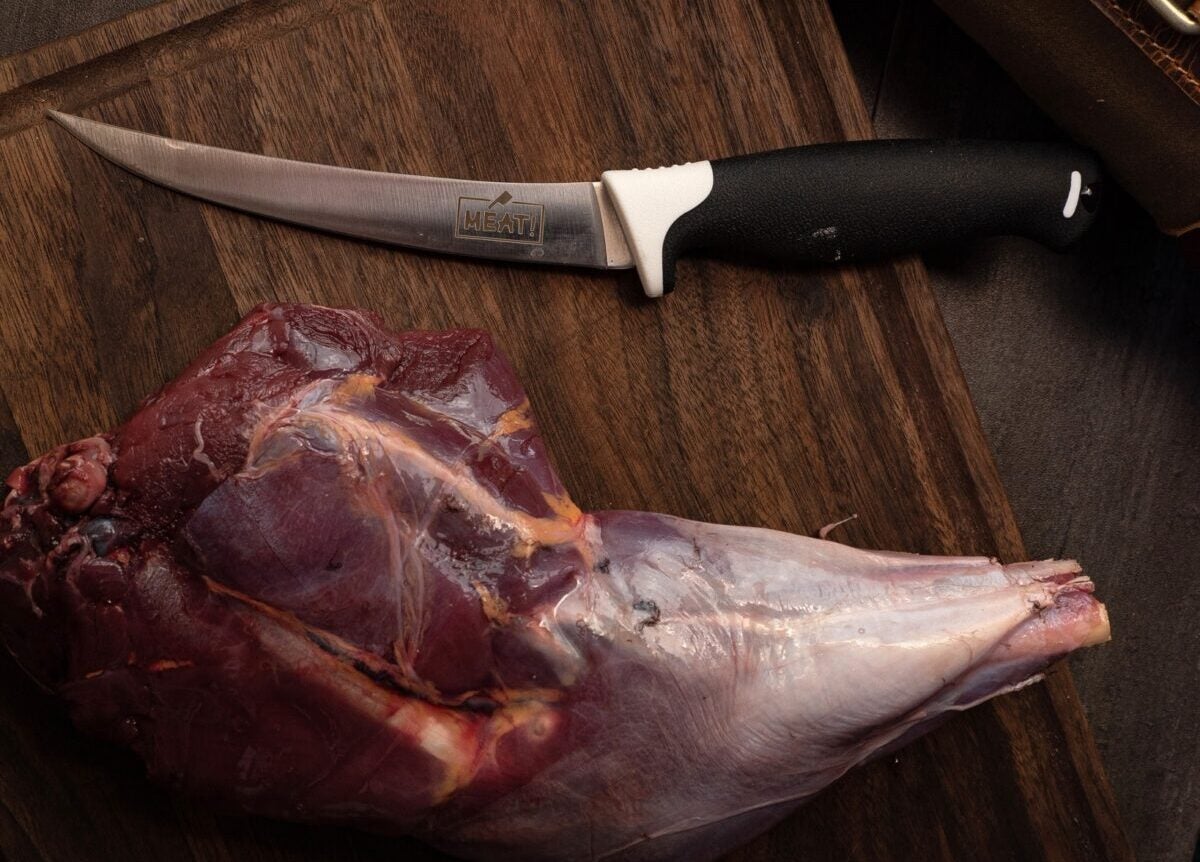
A number of sharp knives (one with a intestine hook is right)Knife sharpenerSmall butcher (bone) noticedRope/chainDeer hangerVacuum sealer/freezer baggageMeat grinderCoolerDeskWater supplyBucket
Area Dressing
Gutting or area dressing the deer helps cut back the danger of contaminating the venison with fecal matter, urine, and anything housed within the abdomen. You’ll typically obtain an additional cost when you don’t field-dress the deer earlier than taking it to the processor, so it’s crucial to know the way to do that as a hunter.
Area dressing is best when utilizing a knife with a intestine hook, nevertheless it’s not vital.
Step 1: Minimize by the pores and skin across the anus till the rectum is free.Step 2: Minimize a 2-3 inch lengthy gap by the pores and skin slightly below the sternum (the place the ribs meet), then flip your blade over, utilizing the intestine hook (to keep away from piercing the stomach wall/membrane), and proceed reducing the pores and skin to the anus and as much as the neck.Step 3: Now, it’s time to pierce the stomach wall slightly below the sternum. Should you don’t have a intestine hook in your blade, you need to use two fingers to create a bit of house between the stomach wall, abdomen, and intestines whereas reducing the pores and skin so that you don’t by accident lower them (that’s a nasty day, belief me…). Step 4: Minimize or noticed the pelvis, if in case you have a small hand noticed (butcher noticed) obtainable, to permit the decrease gut to move by with out tearing.Step 5: Noticed or lower by the highest of the sternum, permitting for simpler entry to the center and lungs.Step 6: Minimize the diaphragm (skinny muscle/membrane) from the rib cage on each side. Step 7: Fastidiously lower the esophagus and windpipe above the center, as far up as you’ll be able to go.Step 8: Use the windpipe to tug the center from the carcass, saving the center and liver (when you or somebody enjoys organ meat).
That’s it! It’s now time to take it house and pores and skin it.
Skinning
Now that you simply’re house, it’s essential to pores and skin the deer. I’ve discovered it most accessible to do that whereas it’s hanging by the rear legs.
Step 1: Minimize a gap giant sufficient to slide the gamble (deer hanger) into between the bone and Achilles tendon on each legs. DO NOT lower the tendon. Doing so will forestall you from hanging the deer, making reducing the meat with out getting particles throughout it rather more difficult.Step 2: Use a rope, cable, or chain over a limb or deer hoist to lift the deer off the bottom; the butt needs to be about eye degree or not less than till the top is off the bottom. Elevate and decrease the deer in accordance with what’s most comfy.Step 3: Now that it’s off the bottom, lower a skin-deep ring across the leg with the blade edge going through out (as a lot as attainable after the preliminary lower) to forestall the hair from getting onto the meat. Step 4: Now you can lower the disguise from the anus to the ring you simply made, following the road the place the brown and white fur meet. Step 5: Pull the pores and skin away from the meat and lower the membrane between the pores and skin and the meat, from the again legs to the ribs. Watch out to chop the membrane and never into the muscle to maintain the meat as clear as attainable. A really sharp knife helps finest with this.Step 6: All of the pores and skin across the stomach and again legs ought to now be free, and the tail is at the moment holding up progress. Press/pull out and down on the tail and lower the disguise throughout it, then rapidly pull down/ pop the tail to separate the joints the place the tail and butt meet earlier than reducing by the tail.Step 7: Transfer all the way down to the entrance legs and pores and skin them such as you did the again legs. You may have to put the leg you’re reducing between your legs to maintain the deer from spinning. You possibly can pull the pores and skin off the again as soon as each entrance shoulders are uncovered as much as the neck. If you wish to hold the disguise, it’s finest to maintain reducing the membrane as a substitute of simply pulling it.
Now that the pores and skin not covers the meat, it’s finest to let it age.

Growing old The Meat
Hanging a deer to let it age will depend on the atmosphere, temperature, deer age, and private desire. Since my deer processing occurs within the storage, I not often get to let the deer cling for so long as I’d like.
When you have a walk-in cooler that can hold the meat above 32°F and beneath 40°F, you need to let it cling for five to 14 days. This enables the great micro organism to interrupt down muscle fibers, tenderizing the meat and making it rather less gamey-tasting.
Nevertheless, for these of us who don’t have a walk-in cooler, let the deer cling for so long as attainable (a few days is finest), so long as the temperature is between 33°F and 40°F. This may be in a single day, just a few days, or only a few hours.
De-Boning/Butchering
As soon as the deer has aged to your liking or the temperature has made that possibility unviable, it’s time to take away the meat from the bone and place it in a cooler. It’s finest to start with the tenderloins.
Step 1: Minimize away the flank meat (the skinny meat connecting the ribs to the hindquarters) to make the tenderloins extra accessible.Step 2: With the deer hanging from the again legs, the tenderloins needs to be slightly below eye degree contained in the carcass. They need to come out simply by reducing close to the groin space and gently pulling (they have a tendency to go increased than most individuals assume). They’re concerning the measurement of a giant fish fillet on most deer and top-of-the-line cuts of meat.Step 3: Now, we are able to work on the hind quarters with out worrying about ruining the tenderloins. The hind quarters are good for jerky and roasts. It is best to discover the place the muscle tissue overlap; that is the place you need to start reducing and separating the muscle tissue from one another. Step 4: As soon as a few of them are separated, you’ll be able to higher attain the bone and lower it off the bones and joints. There’s not a reasonably method of doing this moreover following the bone.Step 5. After eradicating the meat from many of the hind quarters (when you take away all of it, the deer will not cling since you lower the meat connected to the Achilles), it’s time to maneuver on to arguably the most effective meat on the deer: the backstraps. It goes up into the hind quarters, so now that they’re eliminated, you need to see precisely the place to make your lower. I prefer to run my knife down the spine, carefully following each vertebra to get as a lot meat as attainable. Then, I lower perpendicularly throughout the highest, pulling and reducing the backstrap off the bones till I reached the neck, the place I lower perpendicularly throughout the underside to free the meat from the carcass. Set each apart for later processing (butterflying the backstrap). Step 6: As soon as the backstraps are eliminated, you’ll be able to lower off the entrance shoulders (You possibly can technically take away the entrance shoulders at any level). That is fairly easy since pulling the entrance leg away from the physique creates an area your knife can naturally slice by. You don’t should be tremendous delicate with this piece, as most of it’s stew or scrap meat. Step 7: Let’s transfer on to the ribs. You possibly can lower the rib meat off the bone or lower the rib bones (this takes up extra space in your freezer). There’s not a ton of rib meat, and it’s fairly robust, so most individuals grind or slow-cook it. Should you’re reducing the meat off the bone, begin on the prime of the ribs and work your method down; that method, gravity is working with you. Merely observe the bone along with your knife and slowly pull the meat from the bone. Repeat on the opposite aspect.Step 8: When you’ve eliminated all of the rib meat, you’ll be able to start butchering the neck. Start the place you narrow the backstrap and observe the backbone down and across the trachea. Step 9: Take your time and end reducing off any chunks of meat you might need missed or initially ignored. Then, you’ll be able to take the deer down and lower the meat off the Achilles space.

Making ready the Meat
Now that many of the meat is off the bones (entrance shoulders nonetheless have bones), it’s time to arrange it for long-term storage. Once more, there are a number of methods of doing this, and my course of always evolves. It usually begins with rinsing the meat.
Washing
Cleansing the meat is important. Nobody needs dust, grass, hair, or particles of their deer stew, burger, or steak. You’ll doubtless have to clean a few of it along with your fingers, as grass and hair are notoriously troublesome to take away as soon as they’ve caught to the membrane.
When you’ve completed the preliminary washing, you’ll be able to start trimming and grinding the meat.
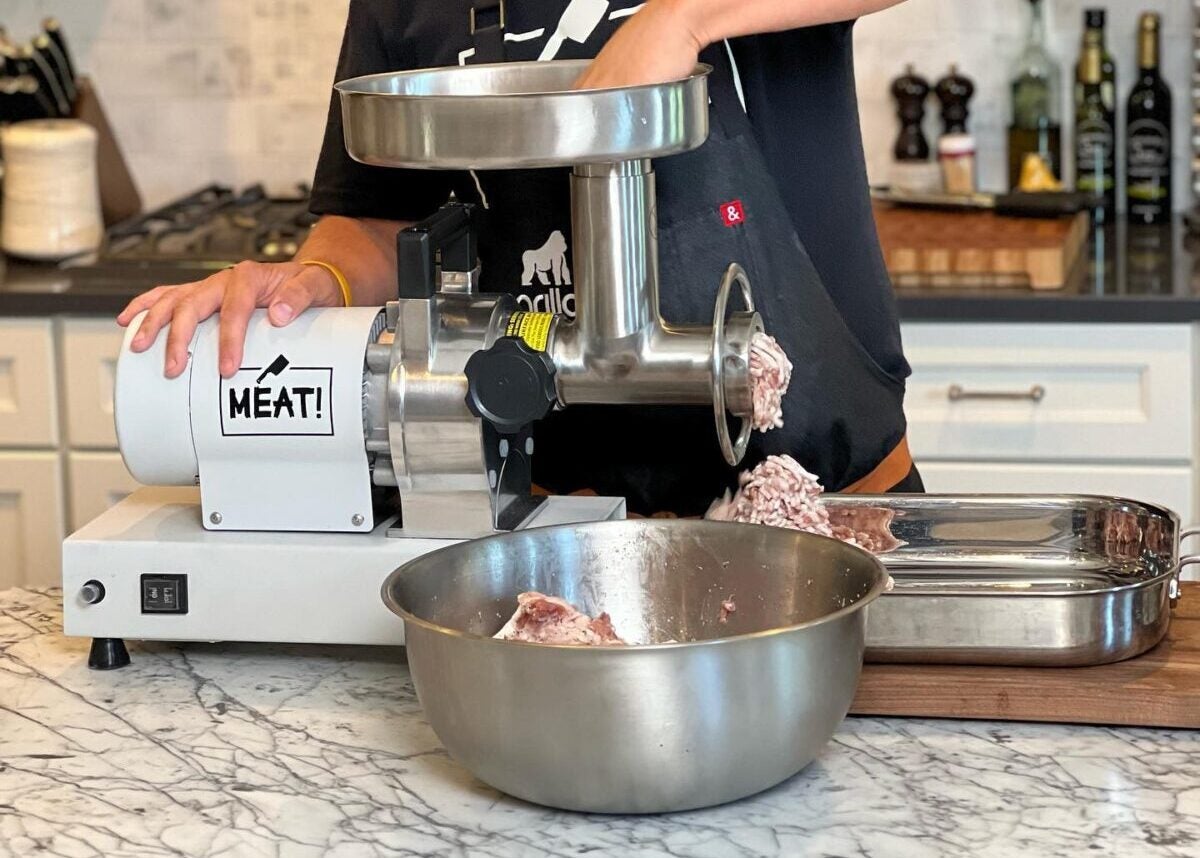
Trimming & Grinding
Should you’re not an enormous fan of wildgame, it’s in all probability as a result of whoever processed the meat did a poor job trimming it. I want to chop out as many tendons and connective tissue as attainable; this contains the silvery membrane the place many of the wild recreation style comes from. It’s on the again straps and plenty of different parts of the meat.
Take your time, and also you’ll thank your self later.
Talking of the backstrap, part it into two—to three-inch chunks earlier than slicing it almost in half. That is referred to as butterflying the backstrap, and it turns it right into a scrumptious steak. If you’d like a thicker steak, lower the chunks a bit of thicker, or don’t butterfly it.
As soon as as a lot of the membrane and tendons as attainable are faraway from the grind meat, it’s time to plop it into the grinder. You’ll discover you might need missed just a few tendons; now could be the time to take away those you see.
I usually depart the entrance shoulder meat connected to the bone and smoke it, however that is very robust meat, so you too can lower it off the bone and gradual cook dinner it or use it in a stew after eradicating as many tendons as attainable.
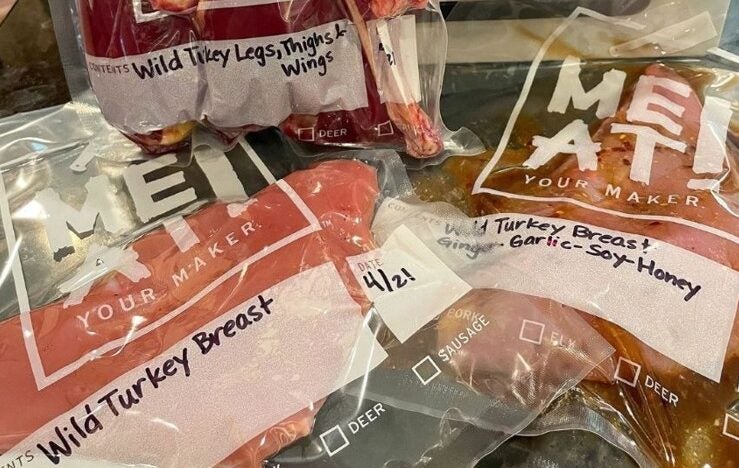
If I discover loads of particles, I want to clean the meat one final time to make sure it’s clear earlier than calmly drying it and putting it in a freezer bag or vacuum sealing it in parts my household usually eats.
Storing
When you’ve packaged all of the meat, it’s time to place it within the freezer. I at all times date it and write what it’s, reminiscent of “At the moment’s Date—Stew Meat” or “At the moment’s Date—Backstrap.” This lets me know what I’m grabbing out of the freezer and the way lengthy it’s been there.
I’ve had deer meat keep good for a number of years, however I’ve had different venison get freezer-burned, and go dangerous in a 12 months. All of it will depend on how effectively you bundle it.
Correctly Eliminate the Scraps
At this level, you need to have a carcass and scraps to get rid of; don’t be lazy and simply toss it within the ditch. As a substitute, learn your searching rules and get rid of it correctly. This typically includes burying it at a particular depth.
Parting Pictures: Greatest Means To Course of A Deer
Now you know the way to course of a deer. After just a few makes an attempt, it isn’t as difficult because it initially appeared.
I do know hunters who can course of a deer in underneath an hour and others who take just a few hours. All of it will depend on how meticulous you need to be and the way effectively you perceive deer anatomy. Having a pointy knife additionally helps a ton, too!
Whereas processing your deer is extra work than taking it to a butcher, growing this talent and figuring out you harvest the deer from area to desk is a sense you’ll be able to’t put a worth on.


